I’ve been developing keto recipes professionally for about seven years now, and if there’s one dish that consistently surprises people, it’s this keto bacon Brussels sprouts recipe. The transformation is remarkable – we’re taking a vegetable that many people actively avoid and turning it into something they genuinely crave.
The secret isn’t magic, it’s food science and proper technique. Most people’s Brussels sprouts trauma comes from poorly prepared versions – you know, the mushy, bitter, boiled-to-death specimens that haunted childhood dinner tables. We’re doing the exact opposite here.
What makes this approach different is that we’re addressing every common objection systematically. Bitterness? We’ve got techniques to neutralize that. Texture issues? We’re creating multiple contrasting textures in the same dish. Flavor complexity? We’re building layers that keep people coming back for more.
Why This Keto Bacon Brussels Sprouts Recipe Changes Everything
Most vegetable side dishes on keto are… fine. They’re acceptable. But they’re not the kind of food that makes people excited about eating their vegetables. This recipe crosses that threshold through some intentional culinary engineering.
The Flavor Transformation That Wins Over Veggie-Haters
The bitterness people associate with Brussels sprouts comes from glucosinolate compounds that break down during cooking. How you cook them dramatically affects this process. Boiling? Actually makes them more bitter by leaching these compounds into the water and concentrating them. Roasting at high heat? That’s the ticket – it caramelizes natural sugars and creates new flavor compounds that balance the bitterness.
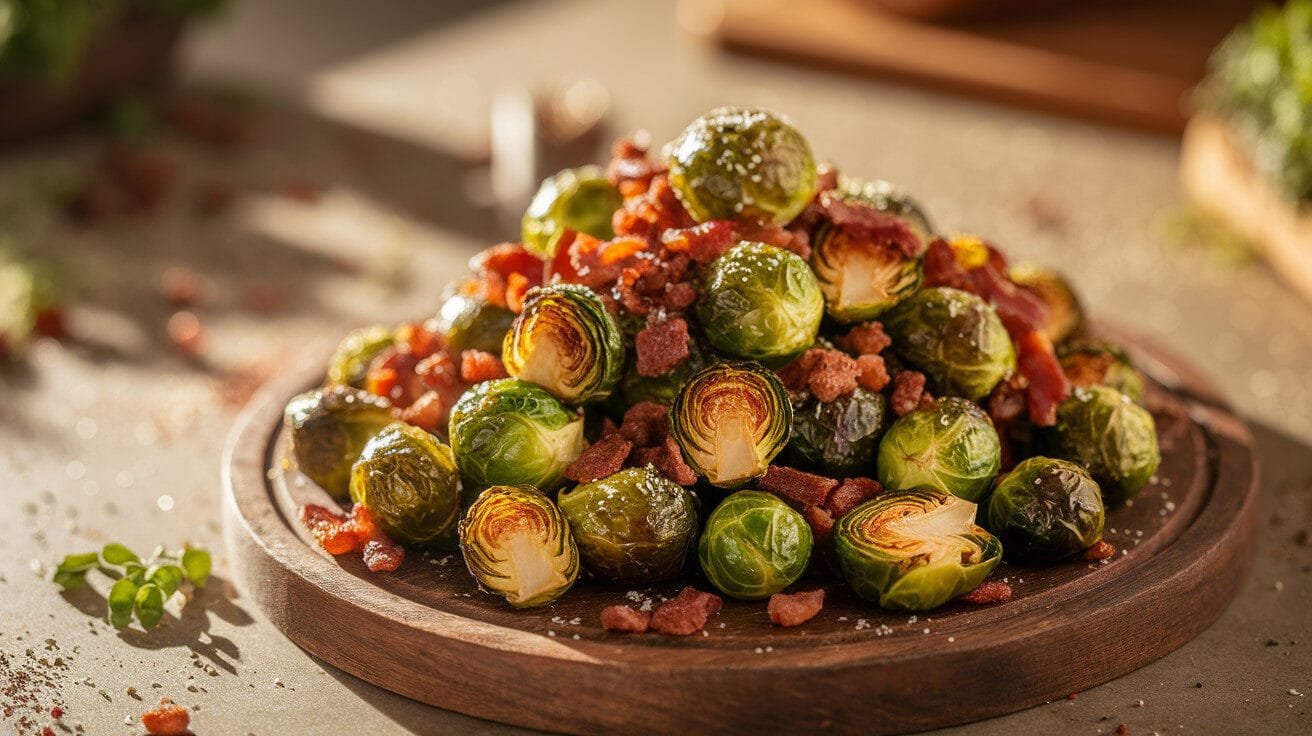
But here’s the real game-changer: we’re using the bacon fat as both a cooking medium and flavor carrier. The rendered fat carries fat-soluble flavor compounds from the bacon directly into the Brussels sprouts, creating this incredible savory depth that completely transforms the vegetable’s character. It’s not just “Brussels sprouts with bacon” – it’s a fundamentally different food experience.
I’ve served this to dozens of self-proclaimed Brussels sprouts haters, and the conversion rate is honestly astonishing. Maybe 90%? The other 10%… well, you can’t win them all.
Understanding the Maillard Reaction for Perfect Crispiness
The Maillard reaction – that beautiful browning process – is everything here. It’s not just about color; it’s about developing complex flavor compounds that make food taste… well, better. But achieving perfect Maillard reaction with Brussels sprouts requires specific conditions.
You need high heat (at least 400°F), relatively low moisture on the surface (hence the thorough drying), and the right pH environment. The bacon fat helps tremendously here because it conducts heat efficiently and evenly, plus it contributes to the flavor development.
What most home cooks get wrong is crowding the pan. If you pile Brussels sprouts into a crowded baking sheet, they steam rather than roast. The moisture released during cooking can’t evaporate quickly enough, so you end up with soggy sprouts instead of crispy ones. The solution is simple but non-negotiable: use a large enough baking sheet and don’t overcrowd.
Gathering Your Keto Bacon Brussels Sprouts Ingredients
The quality of your ingredients directly impacts your final result, but “quality” doesn’t necessarily mean “expensive.” It means choosing the right components for the job.
Choosing the Right Brussels Sprouts and Bacon
For Brussels sprouts, look for firm, bright green sprouts with tightly closed leaves. Smaller sprouts (about 1-inch diameter) tend to be sweeter and more tender than massive ones. Avoid any with yellowing leaves or that feel soft when gently squeezed.
The bacon selection is crucial. You want thick-cut bacon because it renders more fat and creates better texture. Look for sugar-free bacon – many commercial bacons contain brown sugar or maple syrup, which adds hidden carbs. I prefer applewood-smoked for the flavor complexity it adds, but any good quality sugar-free bacon works.
Here’s my ingredient list after extensive testing:
Main Ingredients:
- 1.5 pounds fresh Brussels sprouts, trimmed and halved
- 8 ounces thick-cut sugar-free bacon, chopped
- 3 tablespoons avocado oil or bacon fat
- 1 medium yellow onion, sliced (optional – adds about 2g net carbs per serving)
Seasonings:
- 3 cloves garlic, minced
- 1 teaspoon smoked paprika
- 1/2 teaspoon black pepper
- 1/4 teaspoon sea salt (adjust to taste)
- 1/4 teaspoon red pepper flakes (optional)
- 2 tablespoons grated Parmesan cheese (optional finishing touch)
Essential Seasonings and Cooking Fats
The fat choice matters more than people realize. Avocado oil has a high smoke point (around 520°F) which means it won’t break down and create off-flavors during high-heat roasting. Olive oil can work, but extra virgin olive oil has a lower smoke point and might impart bitter notes when heated this high.
The seasoning combination here is designed to complement without overwhelming. Smoked paprika echoes the smokiness from the bacon while adding depth. The garlic should be fresh-minced rather than powdered – the flavor compounds are different and more complex.
I’m somewhat particular about when to add the garlic, honestly. If you add it at the beginning, it can burn and turn bitter. If you add it at the end, it might be too sharp. The sweet spot is about halfway through cooking.
Step-by-Step Cooking Instructions for Perfect Results
This isn’t a complicated recipe, but the details make the difference between “good” and “restaurant-quality.”
Preparing Your Brussels Sprouts and Bacon
Start by preheating your oven to 400°F. This is hot enough for proper browning but not so hot that the exterior burns before the interior cooks through.
Trim the stem ends of the Brussels sprouts and remove any loose or discolored outer leaves. Cut them in half from stem to top – this creates more surface area for browning and allows the heat to penetrate more evenly. If you have particularly large sprouts, quarter them for even cooking.
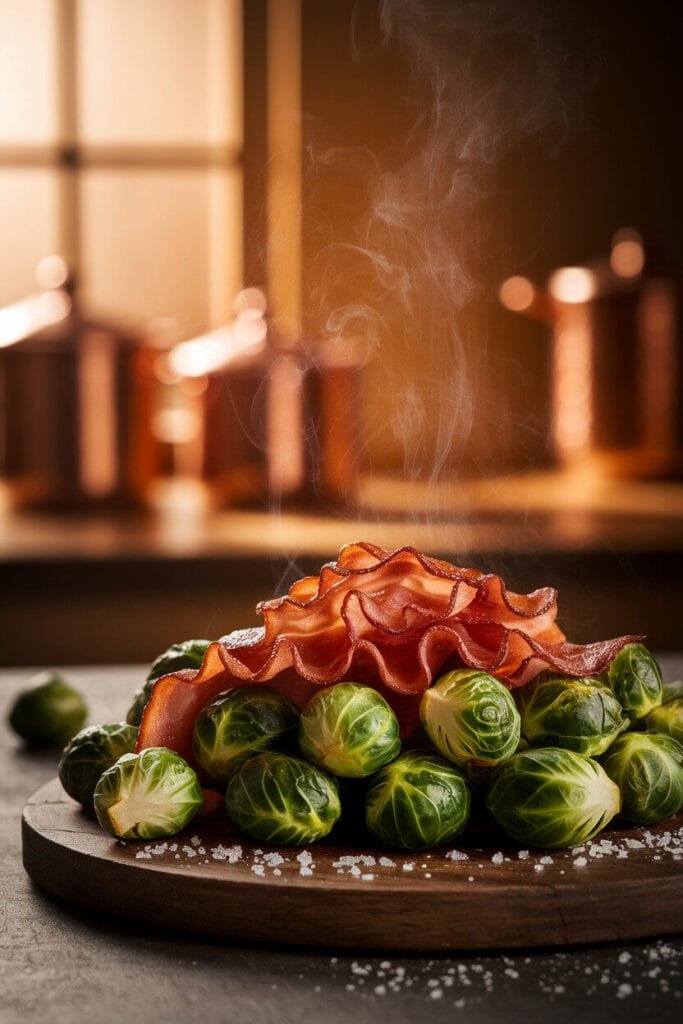
For the bacon, cut it into 1-inch pieces before cooking. This gives you better distribution throughout the dish and more consistent rendering. Some recipes have you cook whole strips and crumble afterward, but I find you get better texture and flavor distribution with pre-chopped bacon.
The Roasting Technique for Maximum Crispiness
Spread the bacon pieces in a single layer on a large baking sheet. Roast for 8-10 minutes until partially cooked but not crisp. This step renders the fat we’ll use for cooking the sprouts.
Remove the baking sheet from the oven and add the Brussels sprouts to the rendered bacon fat. Drizzle with additional oil if needed – you want enough fat to coat all the sprouts evenly. Toss to combine, then spread in a single layer with cut sides down where possible.
Roast for 15 minutes, then remove from oven and add the minced garlic. Toss everything together – this prevents the garlic from burning. Return to oven for another 10-15 minutes until sprouts are tender and nicely browned with crispy edges.
Testing for Doneness and Final Seasoning
The doneness test is simple: pierce a sprout with a paring knife. It should slide in easily with little resistance. The exterior should be browned and crisp in places, while the interior is tender but not mushy.
Season with salt, pepper, smoked paprika, and red pepper flakes if using. Toss to combine. The residual heat will bloom the spices and distribute the flavors evenly.
If using Parmesan, sprinkle it over the top right before serving. The heat will melt it slightly, creating little crispy-chewy bits throughout.
Pro Tips for Storage and Meal Prep
This dish holds up surprisingly well, which makes it fantastic for meal prep.
How to Store and Reheat for Optimal Texture
Store leftovers in an airtight container in the refrigerator for up to 4 days. The texture will soften somewhat, but the flavors actually improve as they meld.
To reheat, use an oven or toaster oven at 375°F for 8-10 minutes. This will restore some of the crispiness. Microwave reheating will make them soggy, so I don’t recommend it unless you’re really pressed for time.
Meal Prepping and Serving Suggestions
This recipe scales beautifully for meal prep. You can easily double or triple the quantities using multiple baking sheets (rotate them halfway through cooking for even browning).
For serving, it pairs wonderfully with roasted chicken, steak, pork chops, or salmon. The bright, savory flavors cut through the richness of fatty meats perfectly.
If you’re making this for a crowd, you can hold it in a warm oven (200°F) for up to an hour before serving. The texture will soften slightly, but the flavor will still be excellent.
[content-egg module=Amazon template=item]
Frequently Asked Questions
Can I make this recipe with frozen Brussels sprouts?
You can, but the texture won’t be as good. Frozen Brussels sprouts contain more water, which means they steam rather than roast and won’t achieve the same level of crispiness. If you must use frozen, thaw them completely and pat very dry with paper towels before roasting.
What’s the best type of bacon for keto Brussels sprouts?
Look for thick-cut, sugar-free bacon. The thickness matters because it renders more fat and creates better texture. Applewood-smoked adds nice flavor complexity, but any quality sugar-free bacon works. Always check the ingredients list for hidden sugars.
How do I prevent my Brussels sprouts from getting soggy?
Three key factors: don’t overcrowd the pan, make sure they’re thoroughly dry before roasting, and roast at high enough temperature (400°F minimum). The single layer is non-negotiable – if they’re piled on top of each other, they’ll steam instead of roast.
Can I make this recipe in an air fryer?
Absolutely. Cook the bacon first at 375°F for 5-6 minutes, then add Brussels sprouts and cook for 12-15 minutes, shaking the basket halfway through. You may need to work in batches to avoid overcrowding.
How many net carbs are in keto bacon Brussels sprouts?
Approximately 6-8g net carbs per serving (based on 6 servings). The exact amount depends on the size of your Brussels sprouts and whether you include the optional onion.
What main dishes pair well with this side?
It’s incredibly versatile. I love it with roasted chicken, grilled steak, pork chops, salmon, or even as part of a breakfast spread with eggs. The bright acidity cuts through rich proteins beautifully.
Can I add other vegetables to this recipe?
Certainly. Sliced mushrooms, cauliflower florets, or radishes all work well. Just be mindful of cooking times – harder vegetables might need a head start before adding the Brussels sprouts.
How long do leftover Brussels sprouts last in the fridge?
3-4 days in an airtight container. The flavor actually improves over the first day or two as the ingredients meld, though the texture will soften. Reheat in the oven or toaster oven to restore some crispiness.