Pumpkin cheesecake bars do the impossible: they taste like a cozy fall hug, slice clean, travel well, and disappear faster than you can say “save me one.” They pack everything you love about pumpkin pie and New York cheesecake into one handheld bite. If you want a dessert that looks fancy but requires zero culinary wizardry, this is your move. Ready to flex your fall baking skills without breaking a sweat?
Why Pumpkin Cheesecake Bars Just Work
Pumpkin and cream cheese belong together.
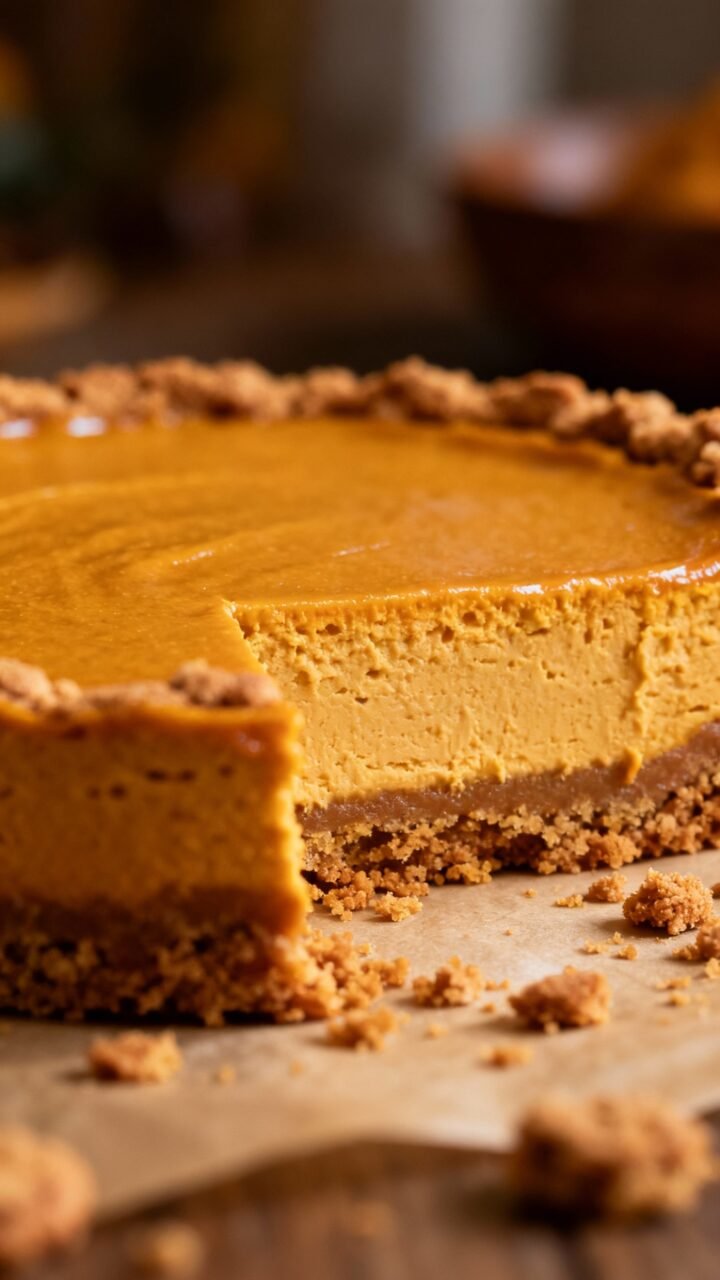
The creamy tang balances the warm spices like they were made for each other. Add a gingersnap crust that crunches a little, and you’ve got textural magic. Bars also beat a full cheesecake when you need convenience.
They slice clean, serve a crowd, and chill faster. Plus, you don’t have to babysit a water bath like it’s a newborn. Bake, chill, slice, done.
The Flavor Power Trio: Pumpkin, Cheesecake, and Gingersnap
Let’s break down the trifecta so you get that perfect bite every time.
- Pumpkin: Use canned pumpkin puree, not pumpkin pie filling. You want pure pumpkin, no added sugar or spices.
It’s consistent, silky, and dependable (unlike that one friend who “forgets” the dessert).
- Cheesecake: Full-fat cream cheese only. We’re not making diet food; we’re making dessert. You get a rich, smooth texture that holds up to pumpkin’s moisture.
- Gingersnap crust: Snappy, spiced, slightly molasses-y.
It brings attitude. You’ll pulse cookies into crumbs, mix with melted butter, and press it into the pan. Zero soggy crust if you pre-bake it briefly.
Spice Blend That Actually Pops
Skip “pumpkin spice” if yours tastes flat. Make it sing with:
- Ground cinnamon (the backbone)
- Ginger (bright heat)
- Nutmeg and cloves (keep them light; they’re bossy)
- Optional: a pinch of cardamom or black pepper for a subtle kick
FYI: Freshly ground nutmeg > pre-ground.
A microplane makes you look like you know things.
What You’ll Need (and Why)
Keep it simple, but don’t skip the essentials.
- Gingersnap cookies: About 12 ounces. Crunchy store-bought works best.
- Unsalted butter: Melted, to bind the crust.
- Cream cheese: 16 ounces, room temp. Softening prevents lumps.
- Granulated sugar + brown sugar: White for structure, brown for depth.
- Pumpkin puree: 1 cup.
Not too much, or it’ll turn custardy.
- Eggs: 2 large, room temp, for structure and silkiness.
- Sour cream: 1/2 cup, for tang and smooth texture.
- Vanilla extract: Flavor insurance.
- Spices: Cinnamon, ginger, nutmeg, cloves, pinch of salt.
Tools That Make Life Easier
- 9×13-inch metal baking pan
- Parchment paper with overhang (for easy lifting)
- Food processor (or a zip-top bag + rolling pin)
- Hand mixer or stand mixer
- Offset spatula for smoothing
Step-by-Step: From Crumbs to Bars
Let’s keep this breezy but thorough. You’ve got this.
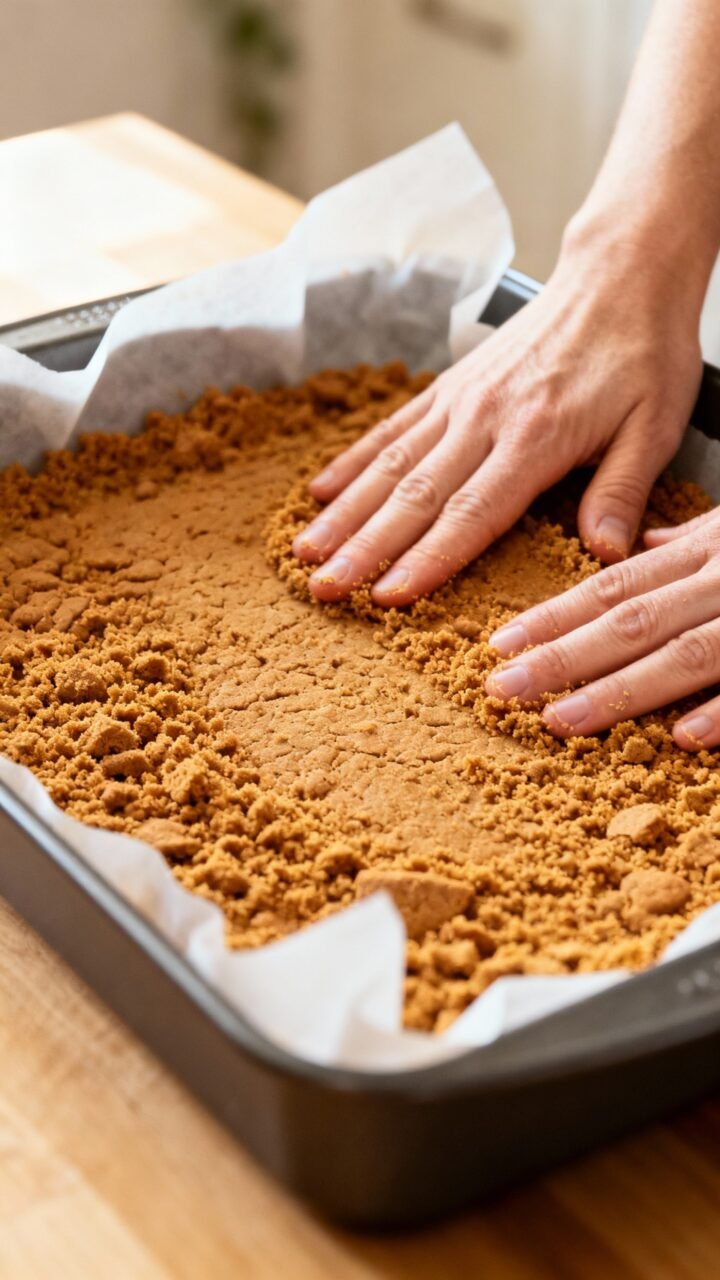
- Prep the pan: Line your 9×13 with parchment, leaving handles. Preheat oven to 350°F (175°C).
- Make the crust: Pulse gingersnaps into fine crumbs.
Stir in melted butter until it clumps like damp sand. Press firmly into the pan. Bake 8–10 minutes until fragrant.
Cool slightly.
- Beat the cream cheese: Mix cream cheese with both sugars until smooth and fluffy, 2–3 minutes. No lumps, please.
- Add the wet stuff: Beat in sour cream and vanilla. Mix in pumpkin.
Scrape the bowl. Add spices and salt.
- Add eggs last: Beat in eggs one at a time on low until just combined. Don’t overmix or you’ll invite cracks.
- Assemble: Pour batter onto crust, smooth the top. Tap the pan on the counter to pop bubbles.
- Bake: 30–35 minutes.
The edges should look set and the center should jiggle slightly. Think “gentle wobble,” not “wave pool.”
- Cool and chill: Cool to room temp, then chill at least 4 hours (overnight = best). Slice into bars with a hot, clean knife.
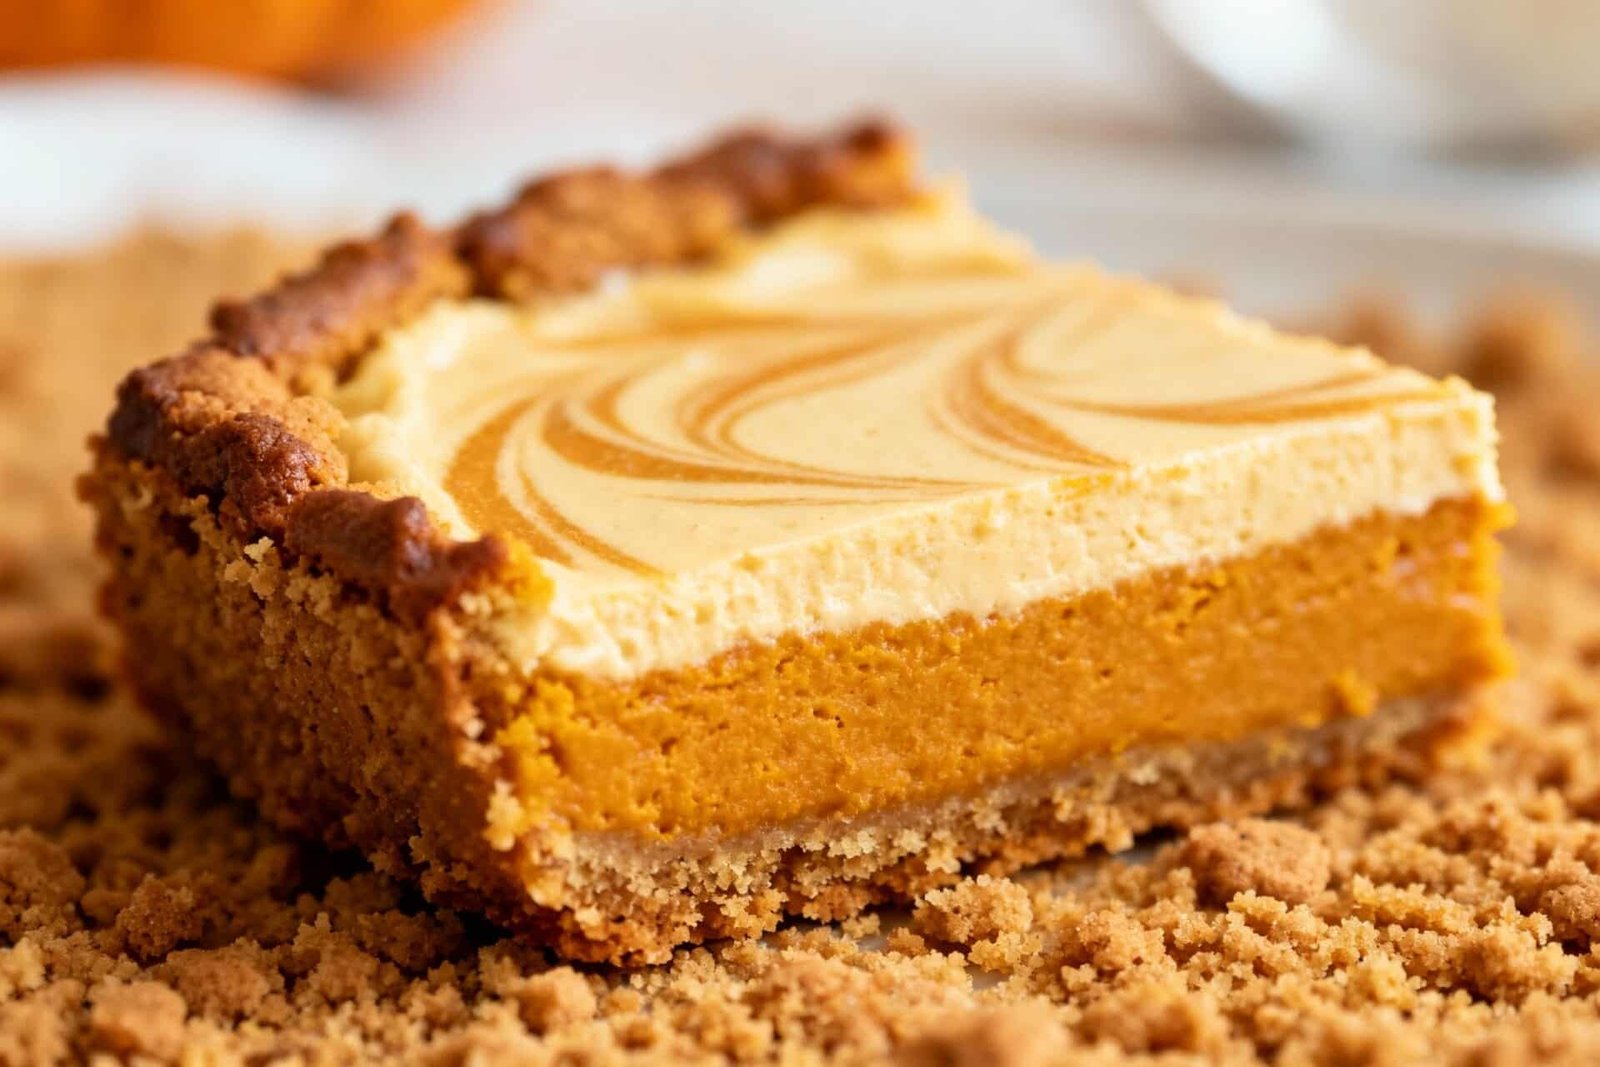
Optional: Swirl It Fancy
Reserve 1/2 cup of plain cheesecake batter before adding pumpkin.
Dollop on top and swirl with a skewer. People will think you took a class. You did not.
Texture Goals: How to Nail It Every Time
You want creamy, not cakey.
Dense, not dry. Here’s how to secure that W.
- Room temp dairy: Cold cream cheese = lumps. Let it sit out.
- Low-speed mixing: Air is the enemy of smooth cheesecake.
Gentle vibes only.
- Don’t overbake: Pull it when the center still jiggles slightly. It finishes setting as it cools.
- Chill thoroughly: The refrigerator does the final magic.
Crust Issues? Fix Them Fast
- Soggy crust: Pre-bake longer and cool before adding filling.
- Crust crumbles apart: Add another tablespoon of butter and press harder.
- Too spicy: Mix in a bit of graham cracker crumbs to mellow it out.
Fun Twists If You Want to Play
Because once you master the base, you can go wild.
IMO, these are the best riffs:
- Maple pecan finish: Drizzle bars with warm maple syrup and sprinkle toasted chopped pecans.
- Salted caramel swirl: Swirl a few tablespoons of caramel into the batter. Finish with flaky salt. Elite move.
- Chocolate line-up: Add mini chocolate chips to the filling.
Pumpkin + chocolate = surprise win.
- Gluten-free swap: Use gluten-free gingersnaps. The texture holds up perfectly.
- Espresso edge: Add 1 teaspoon instant espresso powder to the batter for a cozy mocha vibe.
Serving, Storing, and Make-Ahead Tips
Let’s talk logistics, because dessert drama is a choice.
- Serving: Slice cold for clean edges. Wipe the knife between cuts.
Top with whipped cream if you’re extra.
- Storage: Refrigerate in an airtight container up to 5 days. The spices bloom over time, which tastes better, FYI.
- Freezing: Freeze individual bars wrapped tightly for up to 2 months. Thaw in the fridge overnight.
- Make-ahead: Bake the day before your event.
Slice just before serving so they don’t dry out.
Portioning for Parties
A 9×13 yields:
- 12 large bakery-style bars
- 16 medium pieces
- 24 bite-size squares (for when you want plausible deniability about how many you ate)
FAQ
Can I use fresh pumpkin instead of canned?
You can, but strain it well. Homemade puree often holds more water, which can make the bars mushy. Roast, puree, then drain through cheesecloth until it’s thick, like canned pumpkin.
If that sounds like a lot, just grab a can and call it a day.
Do I need a water bath for these bars?
Nope. Bars bake thinner than a full cheesecake, so they set without intense cracking drama. If your oven runs hot, reduce the temp by 25°F and keep an eye on the jiggle.
The chill time solves minor surface cracks anyway.
How do I prevent a sticky top?
Let the bars cool to room temperature before covering, then chill uncovered for the first hour. After that, cover lightly. If condensation forms, dab gently with a paper towel.
A thin whipped cream layer also hides everything like makeup for desserts.
Can I make these without gingersnaps?
Totally. Graham crackers bring a classic vibe. Add 1–2 teaspoons of extra ginger and cinnamon to the crust to keep the flavor bold.
You can also go half graham, half gingersnap for a balanced, less spicy base.
What if my bars crack?
Don’t panic. Cracks mean nothing once you slice them. Also, whipped cream, caramel drizzle, or a dusting of cinnamon covers everything.
Focus on flavor, not cosmetic perfection.
How do I know when they’re done?
The edges should look set, and the center should wobble slightly when you nudge the pan. If it looks sloshy, give it 3–5 more minutes. Remember: they continue to firm up as they cool and chill.
Conclusion
Pumpkin cheesecake bars with a gingersnap crust deliver maximum fall flavor with minimum fuss.
You get silky, spiced filling, a snappy crust, and zero stress. Make a batch, stash a few in the back of the fridge for “later,” and watch them mysteriously vanish. Fair warning: once you bring these to a party, you’re in charge of dessert forever—IMO, a worthy legacy.


